Introduction to Slip Stitch
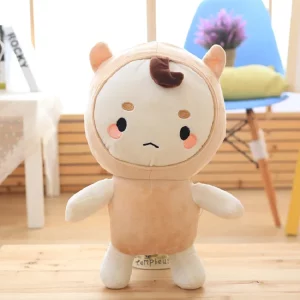
Welcome to a comprehensive guide on the Slip Stitch, also known as the Ladder Stitch or Invisible Stitch. This fundamental sewing technique is invaluable for neatly closing openings in various items, such as pillows, stuffed animals, and linings. The unique feature of the Slip Stitch is its ability to join two sides together while keeping the stitches hidden, ensuring a clean and professional finish.
Essential Tools and Setup
Selecting the Right Needle and Thread
- A skinny and sharp needle is crucial for this technique, allowing for easy and precise fabric piercing.
- Use a thread with a knot at the end to prevent it from pulling through the fabric.
Preparing the Fabric
- Please start with the needle inside the project to bring it out as close to the opening as possible.

- Ensure the seam allowance (the excess fabric at the edge) is neatly tucked in on both sides of the opening. This creates a clean fold that serves as the foundation for your stitching.
Stitching Process
The Initial Stitch
- Your first stitch is crucial. It should be directly opposite where the thread exits the fabric, ensuring it enters and exits along the fold. This positioning allows the stitch to catch only a single layer of fabric, contributing to its invisibility.

Maintaining Stitch Alignment
- Keeping your stitches parallel to the fold is key for a uniform and invisible appearance.

- Pull the thread after each stitch to flatten it, avoiding unwanted fabric gathering.
Creating the Ladder Effect
- As you progress, your stitches will start forming a pattern resembling a ladder’s rungs, giving the technique its ‘Ladder Stitch’ name.

- Using a thread that matches the fabric color is ideal for the stitches to be truly invisible. In this tutorial, contrasting thread is used for better visibility.
Ensuring Neatness and Consistency
- If you notice any gaps or bunching in your stitching, it might be due to the size of the stitches or their alignment. Adjusting to smaller, more aligned stitches can enhance the finish.
- Check where your thread exits the fabric and aim to stitch straight across to the opposite fold.
Finishing the Stitch
Securing the End
- To finish, make a small loop with your thread and pass it under some fabric or near the last stitch. Pull through this loop to form a knot.

- Then, hide the knot by threading the needle into the seam and out the side of the fabric, effectively sinking the knot into the seam allowance.

Thread Color Considerations
- While the tutorial uses a contrasting thread for demonstration, it’s best to use a thread color that blends in with your fabric in actual projects. The color of the thread should be barely visible to maintain the stitch’s invisibility.

Conclusion and Application
The Slip Stitch is an essential skill in sewing, offering an elegant and nearly invisible solution for closing fabric openings. This detailed guide is designed to help you understand and master this technique, thus enhancing the quality and finish of your sewing projects. Practice this method, and you’ll soon be capable of achieving professional-looking results in your sewing endeavors. Happy sewing!