Introduction
Embroidery adds intricate detail and personality to plush toys, garments, and other creations. In this tutorial, we’ll explore the process of designing eye embroidery using Embird, a versatile embroidery program. Whether you’re a novice or an experienced embroiderer, mastering this skill will enhance your projects and bring them to life.

Designing Eye Embroidery in Embird
Selecting and Importing Pattern

To begin, choose your pattern and import it into Embird. You can either import a pre-existing pattern or scan your design into your computer and paste it into Embird. Ensure that your pattern is accurately placed within the embroidery hoop to match your desired design dimensions.
Choosing Hoop Size

Select the appropriate hoop size in Embird to match your design. This ensures that your embroidery fits perfectly within the designated area. Adjust the size and orientation of the hoop as needed to accommodate your pattern.
Precision in Design
When tracing your design in Embird, ensure precision by sectioning off each color. Avoid overlapping stitches excessively, as this can lead to bulky embroidery. Factor in the fabric’s stretchiness, especially with materials like minky or fleece, by adding a basting stitch to prevent distortion during embroidery.
Adjusting Parameters

Create the pattern by drawing it. Once you have completed the design, right-click and select the option to generate the stitches. You can change the parameter by clicking right and unclick


Fine-tune parameters like density and fill design to optimize your embroidery. Lower density settings prevent fabric pile from protruding through stitches. Experiment with different fill patterns to achieve the desired texture and appearance.
Create the eye section by outlining the eye shape and then choose the white color.


Another option is to adjust the parameters to 2.0 and customize the plain fill according to your preferences.


Draw the pupil outline to define its shape and dimensions accurately. To create the pupil, select the shape tool and opt for the ellipse option. Afterward, you can customize the ellipse by right-clicking on it to access editing options and change the color.


To create the iris, use the column object tool by clicking on the three-column option.

Once the iris is drawn, you have the option to modify its color to your preference.

Sketch the circular shine to add a touch of brilliance to the eye.


Finally, outline the eye with a bold, dark line to complete the look.


Managing Stitch Order
Organize the stitch order to minimize thread changes and optimize embroidery efficiency. Arrange the sequence so that similar colors are embroidered consecutively, reducing the need for frequent thread changes.


Select “Compile” and transfer the design to Embird Editor, where you can then specify the drawing format.


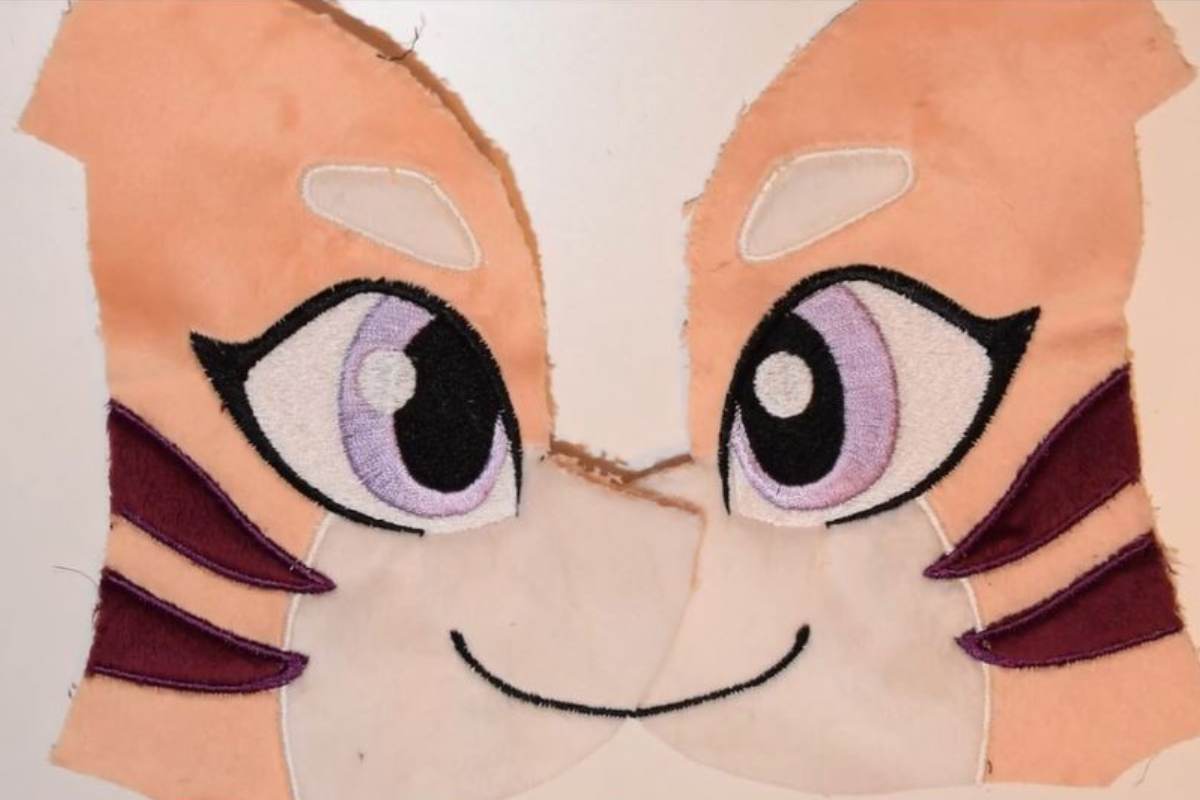
Converting to Embroidery
Differentiate between embroidery and applique pieces within your design. While applique works well for some elements, like eyebrows or stripes, eyes typically benefit from embroidery for added detail. Use fill stitches for areas like the white of the eye and pupil, and column stitches (satin stitches) for the iris to create dimension.
Testing and Refinement

Before finalizing your design, conduct test stitches to identify any issues or areas for improvement. Adjust stitch placement, density, and outlines as needed to achieve the desired result. Iterate on your design until you’re satisfied with the outcome.
Finalizing and Stitching
Once you’ve perfected your design, save the embroidery file and prepare it for stitching. Load the design into your embroidery machine, ensuring proper alignment and orientation. Stitch out your design, closely monitoring the process for any unexpected issues.

If you discover any errors during testing, feel free to make further edits to the drawing before finalizing it.

Conclusion
Designing eye embroidery in Embird offers endless creative possibilities for embellishing your plush toys and other projects. By mastering the techniques outlined in this tutorial, you can achieve professional-quality results and bring your creations to life with intricate eye details. Experiment, refine, and enjoy the process of transforming your designs into stunning embroidered masterpieces.