Introduction Adding scent to plushies can enhance the overall experience of cuddling with them. This article’ll explore a DIY method of making scent packs for plushies using fragrance oil and sachet beads. Unlike pre-made scent packets, this method offers flexibility in choosing the scent and adjusting its strength to suit individual preferences. Choosing Materials The key materials needed for this project are sachet beads and fragrance oil. Sachet beads, resembling poly pellets, are specifically designed to absorb fragrance oils without melting. They can be purchased from various online stores. Additionally, fragrance oil, such as Aloha scent, adds a pleasant aroma to the beads. It’s essential to follow the instructions provided […]
カテゴリー: DIYガイド
Exploring Eye Embroidery Design with Embird
Introduction Embroidery adds intricate detail and personality to plush toys, garments, and other creations. In this tutorial, we’ll explore the process of designing eye embroidery using Embird, a versatile embroidery program. Whether you’re a novice or an experienced embroiderer, mastering this skill will enhance your projects and bring them to life. Designing Eye Embroidery in Embird Selecting and Importing Pattern To begin, choose your pattern and import it into Embird. You can either import a pre-existing pattern or scan your design into your computer and paste it into Embird. Ensure that your pattern is accurately placed within the embroidery hoop to match your desired design dimensions. Choosing Hoop Size Select […]

Adding Dimension into 2D Plush Components
Introduction: Elevating Your Plush Creations Are you tired of your plush creations looking flat and lacking dimension? If so, you’re in the right place! In this tutorial, we’ll explore how to add depth and detail to your 2D plush parts, taking your creations to the next level. Whether you’re crafting wings, tails, or other intricate pieces, these techniques will breathe life into your designs. Lining with Quilt Padding: The Foundation of Dimension The first step in adding dimension to your plush parts is lining them with quilt padding. This simple yet effective technique provides structure and thickness, transforming flat pieces into dynamic components. When selecting quilt padding, consider both thickness […]
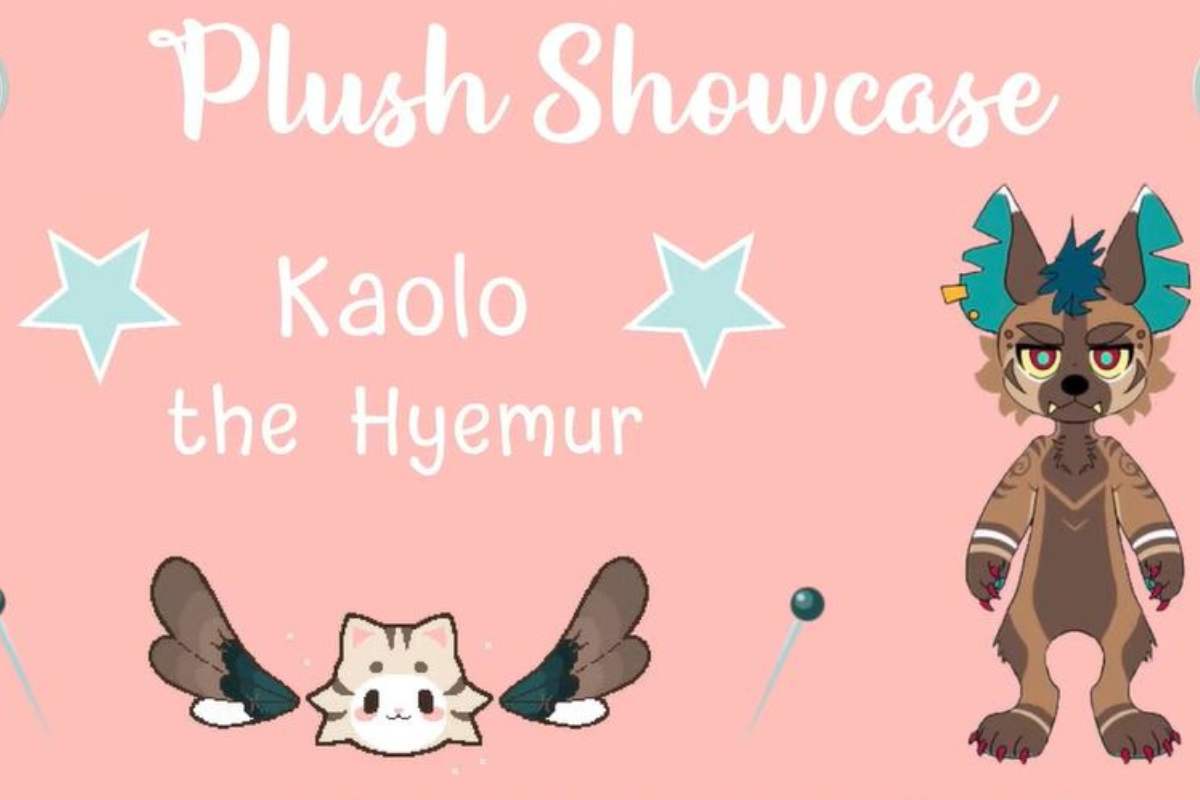
Crafting Handmade Plush Showcase of Kaolo the Hyemur
Introduction Step into the wonderful world of making soft toys by hand! Here, every stitch is like a little story, and each toy is made with lots of love and care. Today, we’re going to explore how Kaolo the Hyemur, a cute plush toy, was created. We’ll take a closer look at all the steps involved, from the very beginning when the pattern was first designed, to the final touches that make Kaolo so special. Crafting Kaolo the Hyemur Adjusting the Pattern Let’s start at the beginning. When we first looked at the pattern for Kaolo, we realized it needed some changes to make it just right. We wanted Kaolo […]
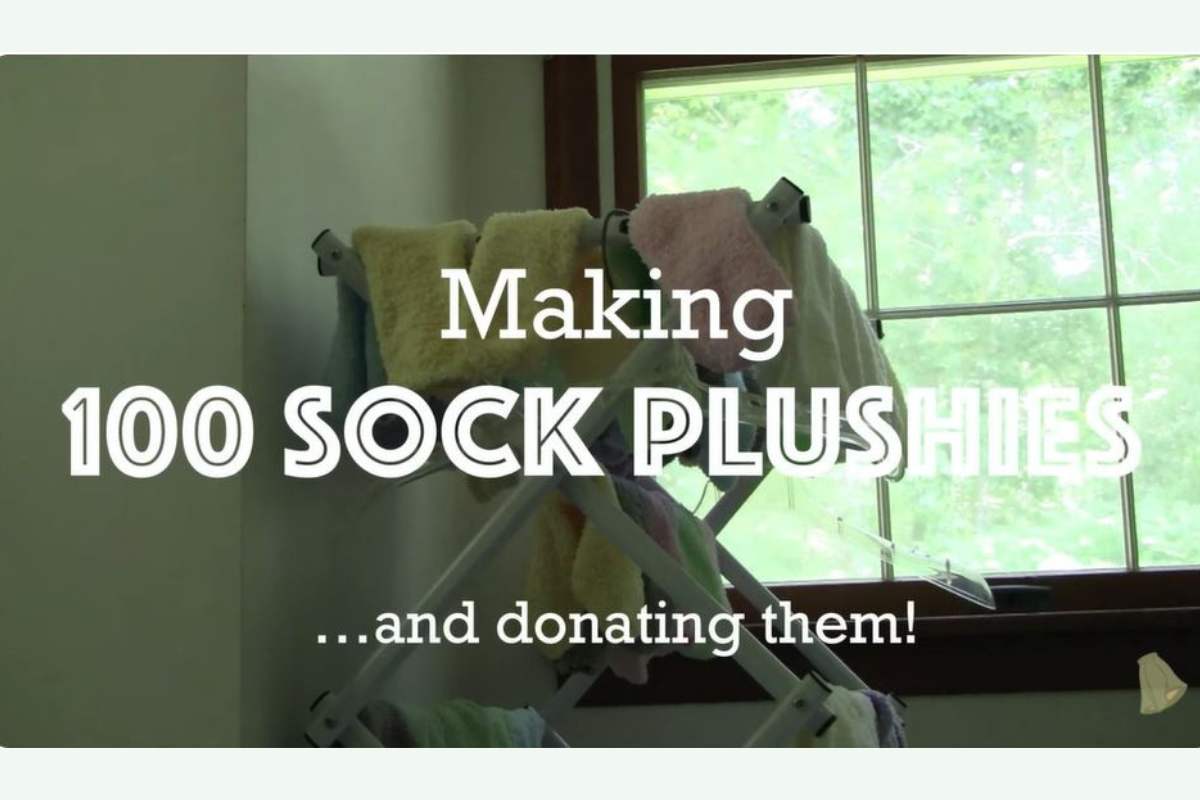
Hand-Sewing 100 Sock Plushies for Donation
Introduction Welcome, everyone! Today, we’re delving into an extraordinary journey of creativity and compassion: hand-sewing 100 sock plushies for donation. In this article, I’ll walk you through the process, sharing valuable insights, tips, and experiences along the way. From selecting materials to stitching techniques and the joy of giving back, join me as we explore the art of crafting plushies with a purpose. So, let’s dive in and learn how to create these adorable plush companions while making a positive impact in our communities. Planning and Preparation Before the first stitch was made, there was groundwork to cover. All the socks, carefully selected for their vibrancy and softness, had to […]
Crafting a Plush Toy of Cutecumber the Tanuki
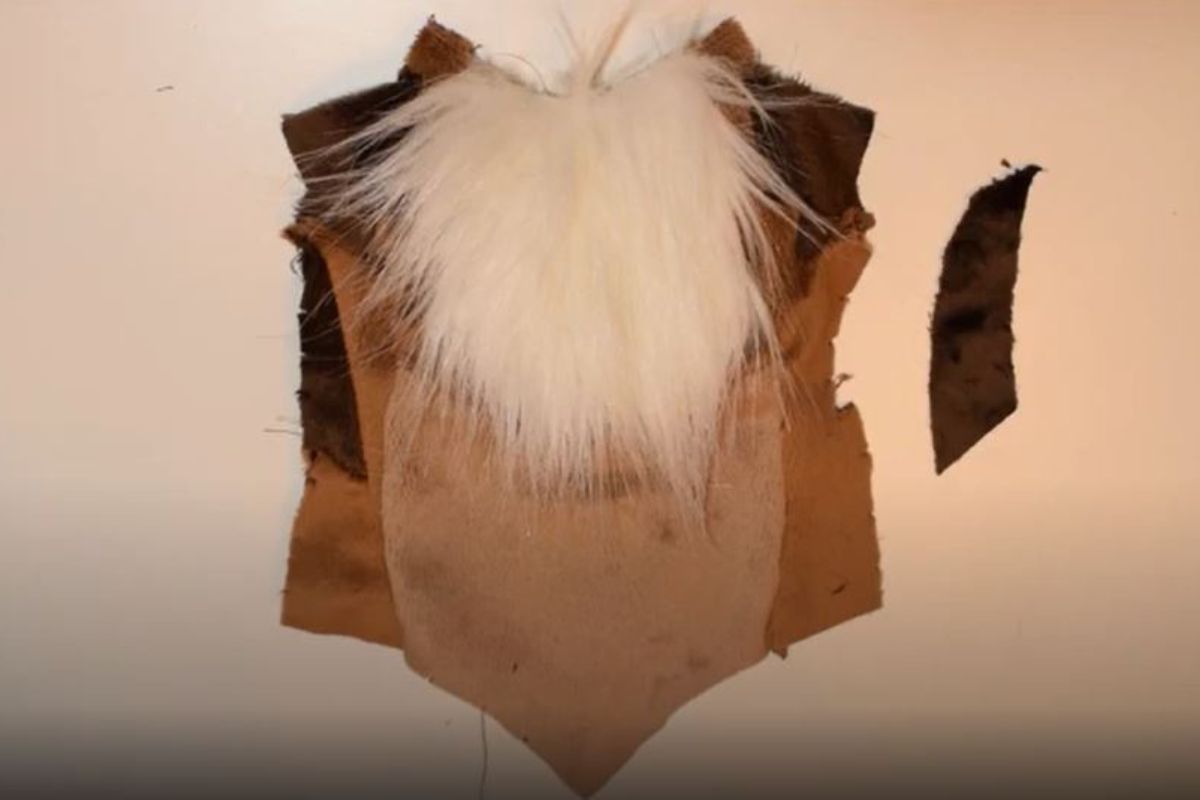
Introduction Embarking on the journey of creating a plush toy is not merely a craft; it’s an endeavor filled with creativity, dedication, and a touch of magic. In this guide, we’ll explore the process of bringing to life the adorable character of Cutecumber the Tanuki in plush form. From selecting materials to sewing techniques, every step is infused with passion and precision to craft a plush companion that captures the essence of Cutecumber’s charm and personality. Crafting Plush Toy of Cutecumber the Tanuki Choosing the Perfect Materials Selecting the right materials is the first step in creating a plush toy that not only looks appealing but also feels soft and […]
The Art of Sewing Triangular Seams for Perfect Plush Creations
Introduction In plush making, understanding how to sew triangular seams is a crucial skill, especially when dealing with color blocking techniques. Color blocking involves transitioning between different colors by creating seams rather than using methods like appliqué or top stitching. While appliqué might be the preferred method for plushes with numerous triangular shapes, such as stripes or zigzag patterns, color blocking becomes necessary when dealing with specific designs that require clean, seamless transitions. In this tutorial, we’ll delve into the process of sewing triangular seams for plush making, focusing on techniques and tips to achieve precise and polished results. Understanding Triangular Seams Triangular seams present a unique challenge due to […]
Mastering Miniature Sewing for Plush Making with Two Techniques
Introduction Creating adorable plushies is an art form cherished by many, but when it comes to sewing tiny, intricate pieces, even experienced plush makers can face challenges. In this comprehensive guide, we will explore two techniques for sewing small plush objects. We’ll focus on creating a perfect nose, a little over one and a quarter inches long, but keep in mind that these techniques can be applied to various small plush elements like claws, teeth, and more. Sewing small pieces demands precision and skill. Whether you’re a seasoned plush artist looking to refine your craft or a beginner eager to learn, these methods will empower you to add intricate details […]
Machine Sewing Techniques for Attaching Plush Appendages
Introduction In the world of plush toy making, attaching appendages like tails, wings, arms, and legs is a crucial skill. While many choose the traditional hand-sewing method, there’s an efficient alternative that not only saves time but also ensures sturdier and cleaner results: machine sewing. In this comprehensive guide, we’ll walk you through the process of machine sewing appendages onto your plushies step by step. Whether you’re a seasoned plush maker or just starting out, this method can be a game-changer in elevating the quality and professionalism of your creations. Machine Sewing vs. Hand Sewing Before we dive into the details, let’s briefly compare the benefits of machine sewing versus […]
ぬいぐるみを完璧に仕上げる:刺繍ミシンを使わずに複雑なディテールを加える
はじめに ぬいぐるみには、その魅力を高める複雑なディテールが施されていることが多い。このようなディテールを表現するために刺繍ミシンがよく使われますが、誰もが刺繍ミシンを使えるわけではありません。このチュートリアルでは、刺繍ミシンに頼らずにぬいぐるみに複雑なディテールを加えるさまざまなテクニックを紹介します。ベテランのぬいぐるみ職人も、これからぬいぐるみ作りを始める人も、これらのテクニックを駆使して、ぬいぐるみ作りのレベルをアップさせましょう。綿布に描く ぬいぐるみにディテールを加える最もシンプルな方法は、布に直接描くことです。この方法には、100%のコットン生地が最適です。やり方は以下の通り:作業面を準備する:作業面を準備する。
コンセプトから抱っこまで:カスタムぬいぐるみ制作の旅
はじめに 自分の芸術的な創作物を、手に取って抱きしめられるような形のあるものにしたいと夢見たことはないだろうか。さて、私が目指したのはまさにそれだ。このブログでは、私のカスタムぬいぐるみに命を吹き込むまでの過程を紹介しよう。最初のアイデアから、デザインへの挑戦、色の選択、専門家とのコラボレーション、そして最後にサンプルの到着まで、これは私が自分だけのカスタムぬいぐるみを実現するまでの物語である。創造性と芸術性の領域では、アイデアを具体的な製品に変えたいという願望が、しばしばエキサイティングな旅に飛び火する。この場合、旅は [...] から始まる。
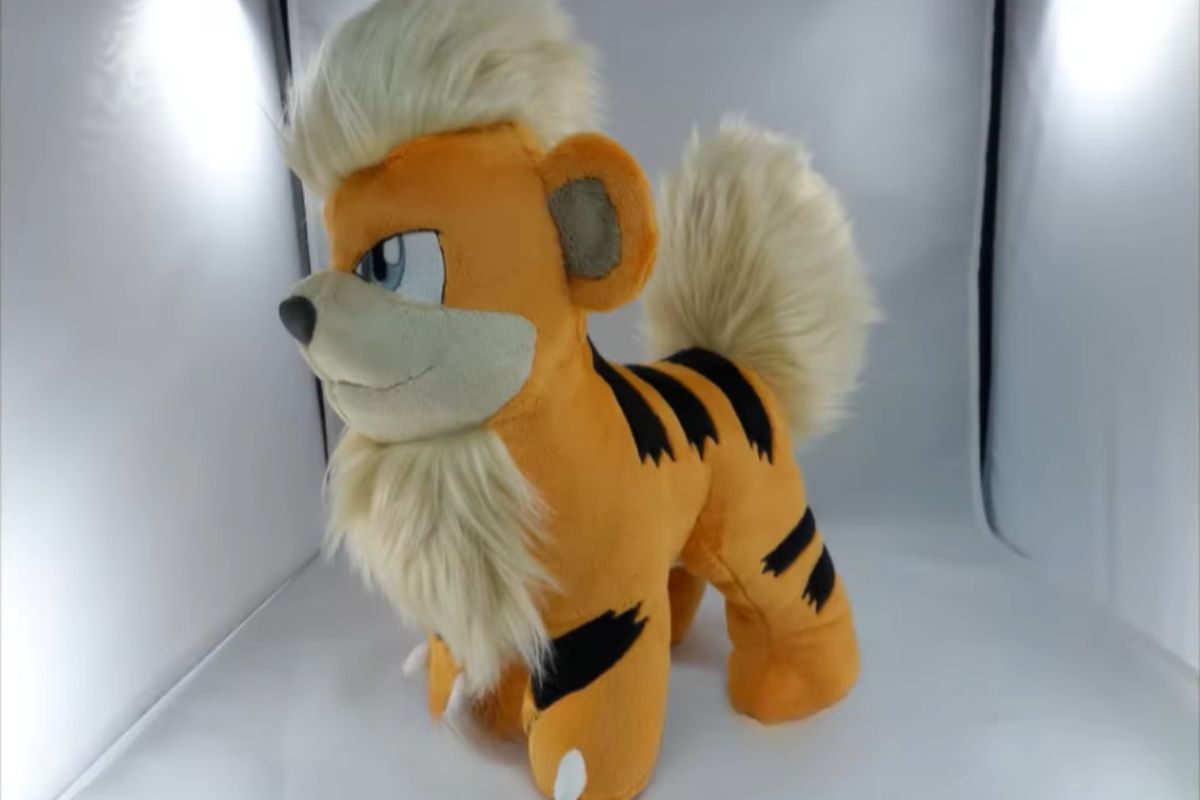
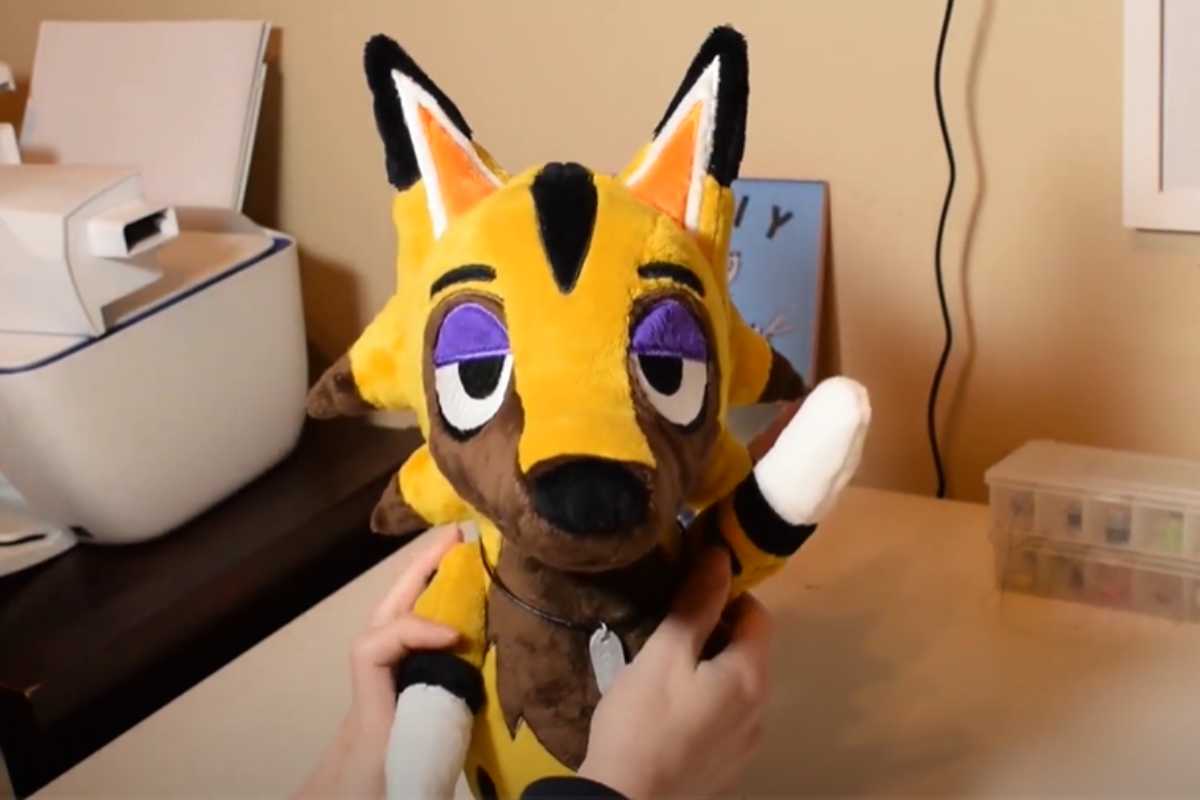
グローリーテぬいぐるみの縫い方:楽しく簡単なDIYプロジェクト
はじめに ポケモンのファンなら、好きなキャラクターのぬいぐるみを自分で作るにはどうしたらいいのだろうと思ったことがあるかもしれません。このブログ記事では、トラの縞模様の犬に似ていて、かわいくて忠実な炎タイプのポケモン、グローリーテのぬいぐるみの縫い方を紹介します。このプロジェクトは裁縫の初心者から中級者向きで、必要なのは基本的な材料と道具だけです。型紙の作り方、生地の裁断と縫い方、ぬいぐるみの詰め方と閉じ方、ディテールの付け方を学びます。このチュートリアルが終わるころには、かわいいグローリーテのぬいぐるみができあがります。
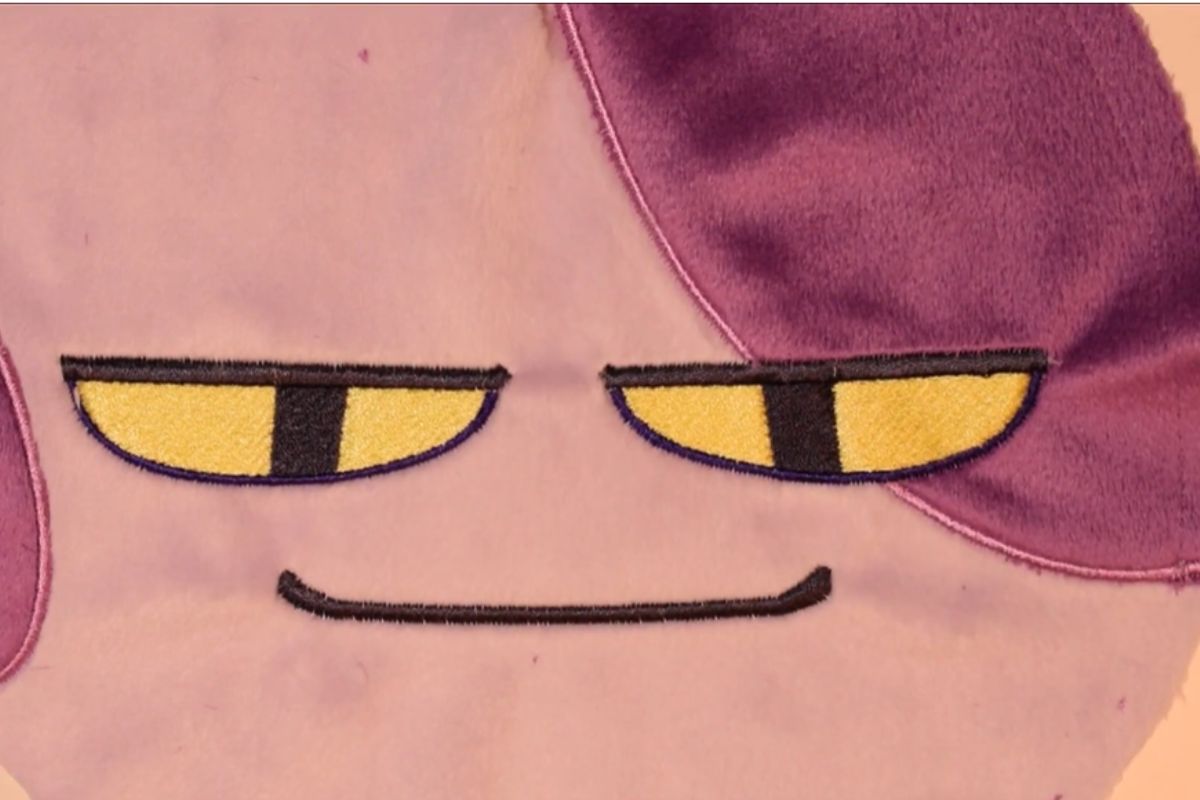
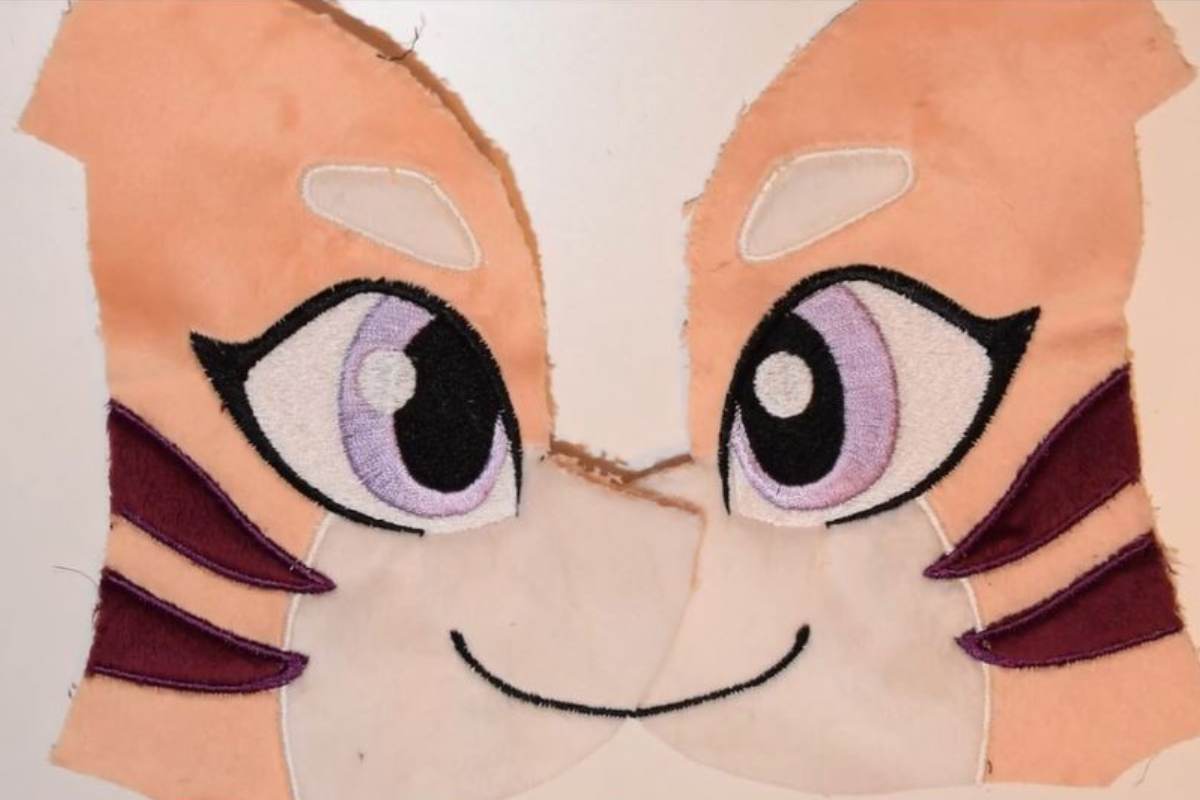
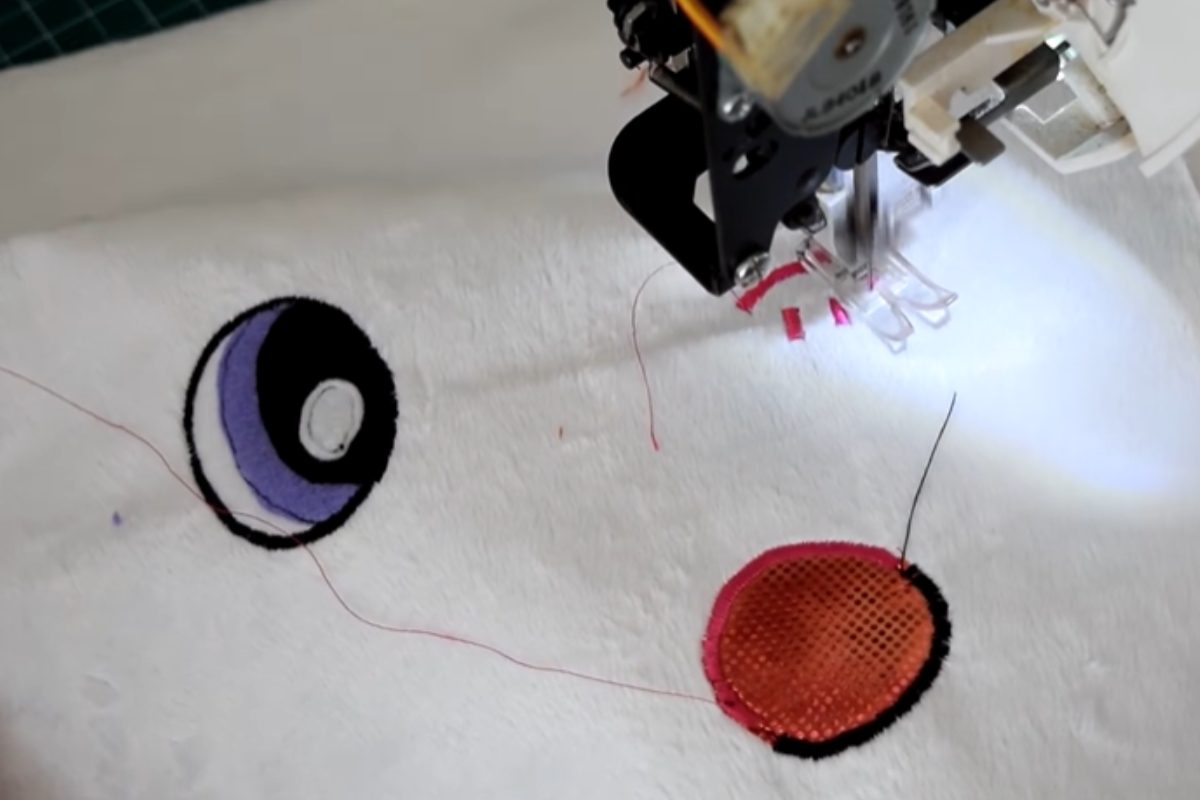
アップリケの縫い目の上に刺繍を施す技術をマスターする
はじめに このブログでは、ぬいぐるみ作りのアップリケの縫い目の上に刺繍を施す技法についてご紹介します。アップリケの上から刺繍をするのは、難しいけれどやりがいのあるテクニックです。Emberのような刺しゅうソフトを使っても、他のソフトを使っても、ここで説明する原則が適用されます。課題を理解する 上から刺繍が必要なアップリケがある場合、アプローチを計画することが重要です。この例では、アップリケの縫い目に重なるキャラクターの目を使用しています。ここでの課題は、刺繍が隙間や歪みなく、きれいで正確に見えるようにすることです。アップリケを作る [...]...
ぬいぐるみの手足のジョイント方法
はじめに ぬいぐるみを作るとき、ジョイントを加えると、ぬいぐるみのレベルが一段と上がります。手足をジョイントすることで、ぬいぐるみがポーズをとったり、触れ合ったりできるようになり、ユニークな個性を与えることができます。このガイドでは、ぬいぐるみの手足をジョイントする方法を、スムーズな動きのためにプラスチック製の安全ジョイントを使って説明します。ぬいぐるみ作りに慣れている人も、始めたばかりの人も、このテクニックを使えば作品に命を吹き込むことができます。プラスチック製安全ジョイントを理解する ぬいぐるみのジョイントにはさまざまな方法がありますが、ここでは、シンプルで効果的なプラスチック製安全ジョイントを使うことに焦点を当てます。このジョイントは、ポスト、ワッシャー、ロックワッシャーの3つの主要な部品で構成されています。プラスチック・ジョイントの構成要素
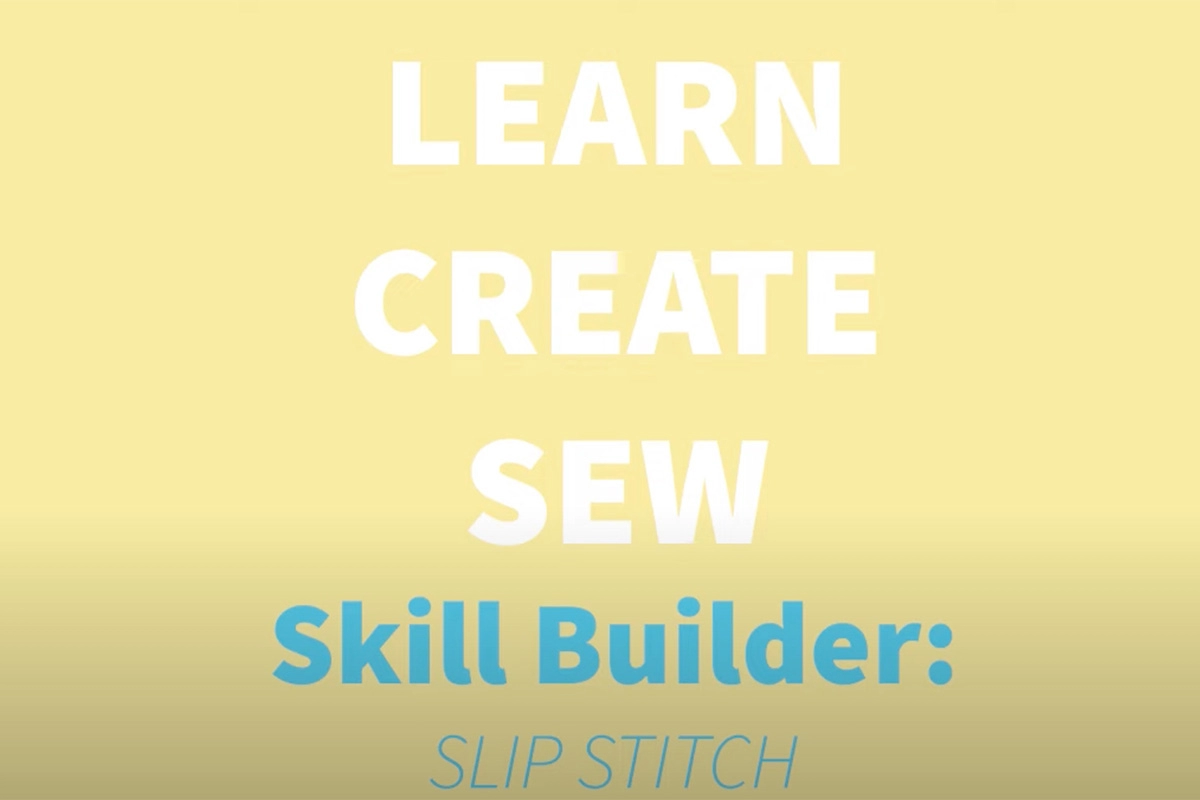
手縫いを極める:スリップステッチ・テクニックのステップバイステップ・ガイド
スリップステッチ入門 スリップステッチの総合ガイドへようこそ。この基本的な縫い方は、枕やぬいぐるみ、裏地など、さまざまなアイテムの開口部をきれいに閉じるのに重宝します。スリップステッチの特徴は、縫い目を隠したまま2つの面を縫い合わせることができるため、きれいでプロフェッショナルな仕上がりになることです。必要不可欠な道具とセットアップ 正しい針と糸を選ぶ このテクニックには細く鋭い針が不可欠。糸は端に結び目のあるものを使い、引っ張られないようにする。
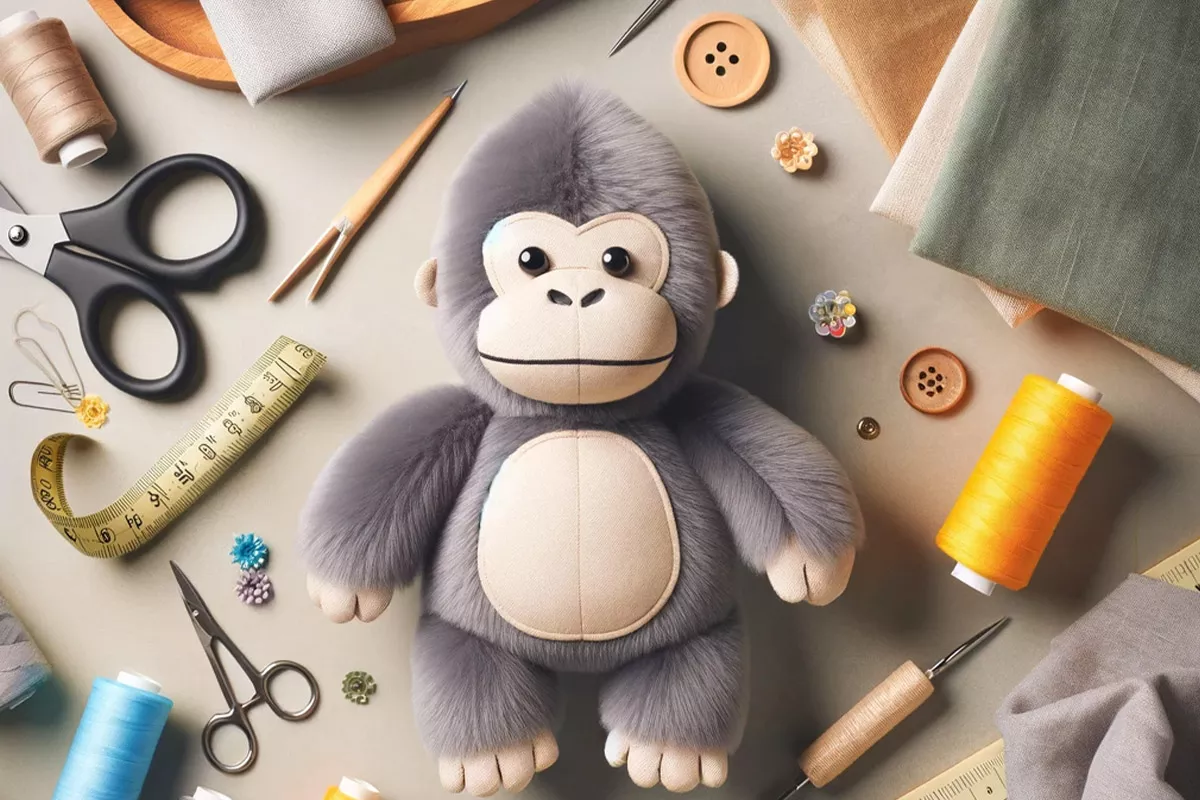
ゴリラ・タグのぬいぐるみを作るには?
ぬいぐるみ作りの楽しさを味わう ぬいぐるみ作りのクリエイティブな世界に飛び込もう!このガイドでは、ゴリラ・タグのぬいぐるみを作ることに焦点をあてています。ぬいぐるみに必要な材料 ぬいぐるみを作るには、基本的な裁縫道具が必要です:縫うための針と糸布を切るためのはさみ適切なサイズを測るためのメジャー。ぬいぐるみの形を整えるための詰め物も忘れずに!ぬいぐるみの型紙と裁断 ぬいぐるみの形を作るには、ゲータレードのボトルの型紙を使います。布を注意深くトレースしてカットし、両方のピースが同じになるようにしましょう。この左右対称が [...] 続きを読む